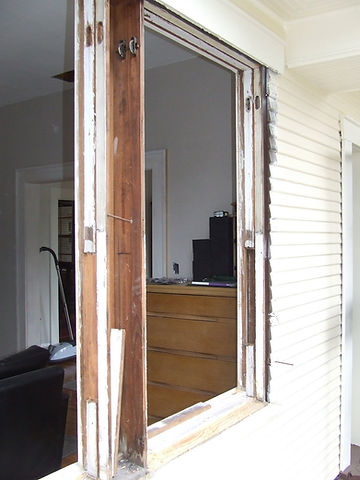
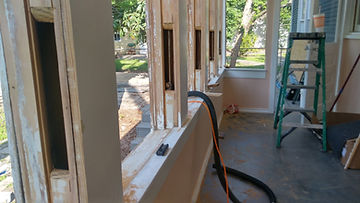
I was in the middle of one of my genius moves several years ago. I had removed the casing from the outside of these windows on an historic home in Tampa, working away on this couple’s windows thinking I was so smart. I took almost the entire window apart to get the sashes out so I could fix them, paint them and put them back in so that they were functional again. I was probably a good two weeks in when I realized I kept seeing the same little cutouts in every window jamb we did. At first it didn’t mean anything to me, but with every window we opened up from the outside, I saw what became clear to me – these were little doors.
Epiphany
These were little doors and my ultimate epiphany was that I was doing these windows all wrong. Why would there be a little door there? Decoration? There was a little slotted screw at the top and another one at the bottom that held it in place and when I removed the screws, the door came off, kinda like how the battery door comes off the remote or garage door clicker when you remove that little screw – same concept.
Why was that little door there? Because once upon a time there was a worker who thought enough of me to put it there. That little door, and her creator – the Doormaker, once taken for granted by the masses of those who worked with their hands, instantly became my teacher as I studied why the door would be there in the first place.
Watch the video of me doing it wrong, when I “knew about window restoration” – here
The Doormaker
This was a person who lived in a different day and age than we live in now. Our age is one where all is disposable, meant to be thrown away, no thought for the future – just me, myself and I in the here and now. The Doormaker lived in an age where people knew one another, were resourceful, gathered on front porches, opened windows and let the breeze lift the curtains off the walls. It was an age where workers took pride in their trade and built not just for money, but so that future generations could participate in, hold in their hands and still find useful, the things that they made. It was an age of thoughtfulness and consideration. That generation left a door for me to find. Behind that door was a lesson.
Save Face
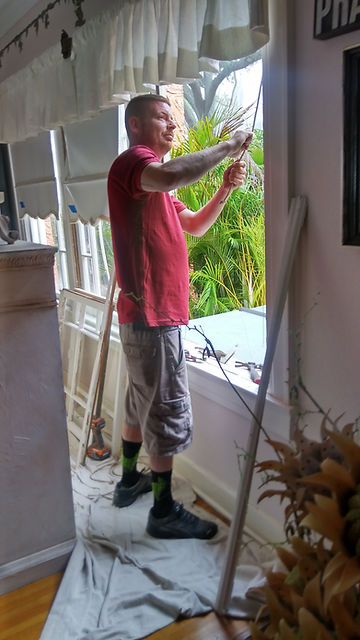
Of course I couldn’t let on to the client that my new teacher and mentor had appeared to set me on a new course. I had to keep going like nothing had changed to keep from being found out that I was nothing more just a student, that I didn’t fully know what I was doing. However on the next job – I removed the sashes in a totally different way – from the inside, the way my new teacher intended.
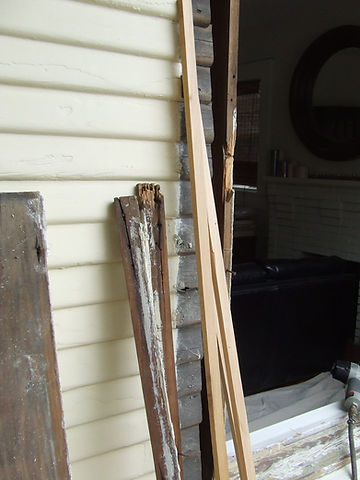
I couldn’t believe I had done all that work on that last house – for nothing. I had taken the casing off, connected to the different colored siding, some of which split. I took another piece of wood off that held the top sash in place, some of those broke. I had to keep track of all those pieces to put back on, then I had to put them back on. Renail them, fill the nail holes, fix the connection between the casing and the siding, touch up paint – crazy amounts of unnecessary work. Days of extra work just to get the windows working!
The Next House
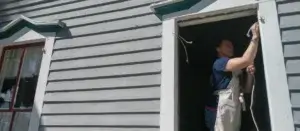
So the next house I tried something new. I took the window apart from inside the house instead of outside. Standing on the floor inside, everything was at eye level, didn’t even need a ladder. I took off two stops that held the bottom sash in place to get the bottom sash out, and there was that little door, held in place with those two screws, hidden on the sides where the edge of the sash goes up and down. I tried to take the little door off at that point but realized quickly that it was pinned behind the parting bead – that little strip of wood that runs up and down between the top and bottom sash. So I took that out on both sides, pulled the top sash out and pulled off that little door. You know what was behind there? Those weights and old ropes. Hundreds and hundreds of windows later, I have yet to pull off the casings again. I lubricated the pulleys, ran some new ropes through, reconnected the weights and put the doors back on. I had to scrape and sand both the sash and the tracks the sash ride up and down in, just a little bit so they’d travel up and down easily, but I put that window back together in about five to ten minutes and it worked perfectly.
Turn of the century windows were designed to be taken apart and worked on from inside the building.
That little door changed my game completely, and that was the Doormaker’s plan all along, to guide my path. There was at one time, a type of worker who was so thoughtful that he arranged to save me countless hours of work. This Doormaker trusted my intelligence enough to figure out what that door was for and used it to teach me how to do the work.
Such is the way of window work – historic preservation window work. The window itself will tell you what it needs if you are conscientious enough to listen and hear. Why? Because the spirit of the crafts-person encapsulated within it sneaks up behind us and gently whispers in our ear what we need to hear. “There’s a door. I put that there so you’d know that you are supposed to work on this window from the inside, that I’ve done it all the harder ways you are trying. Listen to me and I’ll tell you other things too.”
Be A Doormaker
So now, many years later I sometimes come across one where there there are no doors. I now take the time to make one, not just for myself, but for the person who will come after me, because I want to be like the teacher who taught me – to think about others, to be considerate in my work, to pour my heart and soul into the work that I do, to pour myself so that the next person who comes will get the lesson as well.
If I am to take a lesson from the Doormaker, it is to be thoughtful in my work, and find simple ways to pass my knowledge on to others. Therefore here are four lessons I’ve learned since my discovery about the doors that will help you take the shortest possible path to a quality window restoration without taking any shortcuts.
Lesson 1
Always do the Mechanical Makeover first, even if you have to make your own doors. This will set up all future work, whether on the sash or frame, to be straight forward, and save you a ton of work down the road.
Lesson 2
When performing the Mechanical Makeover to set up future work, put all the pieces back in place in the following way. The top sash goes in first, by hanging it on the new ropes you installed, then the parting beads go in after that. Next hang the bottom sash on the new ropes and then put the window stops in.
Lesson 3
Nail the parting bead and stops in place, but only on the right side, leaving the parting bead and windows stops on the left, loose and easily removed. This will enable you to get the sash out quickly, to do the work you want to do and get them back in just as quickly as you took them out. Because the parting bead and stops are nailed in place on the right side, the window can be secured quickly and still be entirely functional.
Lesson 4
Leave the window in this configuration until you are 100% complete with both the sashes and the frame restoration. Once you’ve completed everything, then nail the left side stop and parting bead on, touch up paint and enjoy your window!
So don’t take it from me, take it from the original Doormaker. Take the window apart from the inside and set it up, via the Mechanical Makeover, to take the shortest path to a quality window restoration.